
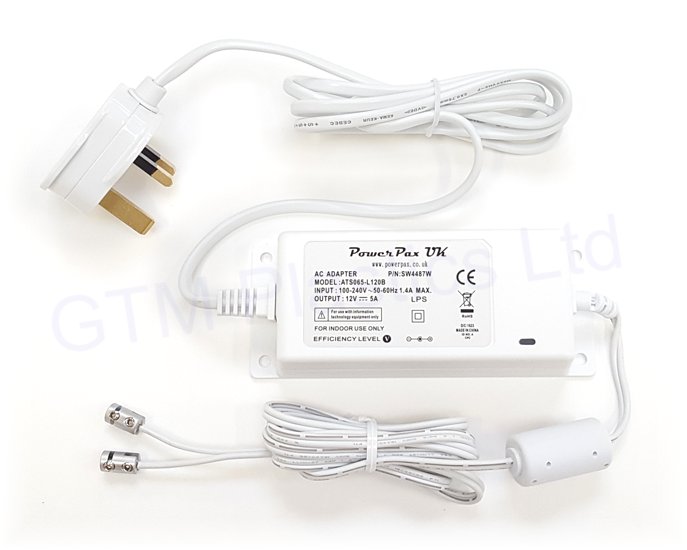
Anyone with experience in undertaking typical household jobs, such as assembling flat pack furniture or mounting cupboards to a kitchen wall for example, will typically feel quite comfortable when tasked with assembling one of these suspended light pocket kits. The power supply output connectors are only 12 volts and the input is a standard UK mains plug.
You will need to use a few basic tools including an electric drill, side-cutters to cut the cable to length, a screwdriver, an Allen key and a tape-measure. Sometimes it helps to consider establishing a plumb line when mounting the cables, but it can be better to rely more on measurements from the adjacent walls because often buildings are not perfectly square and can even be leaning over slightly.
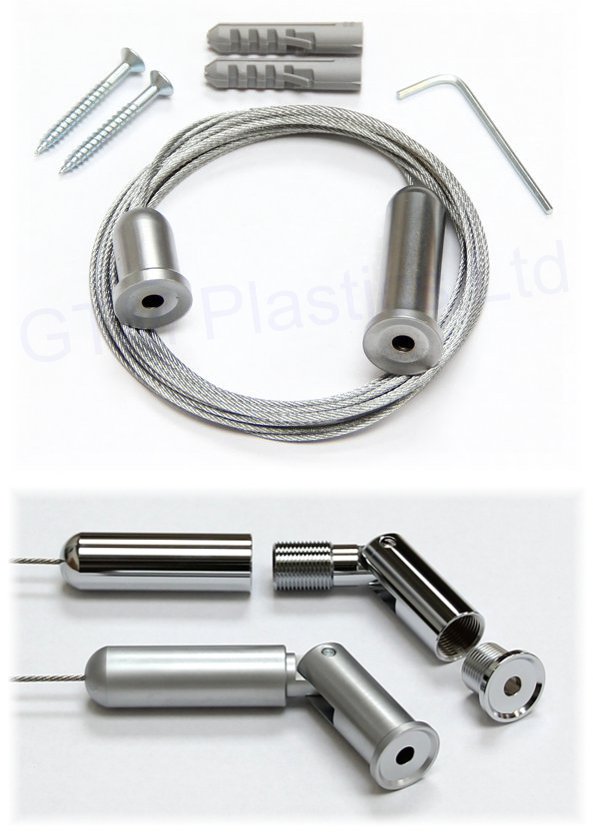
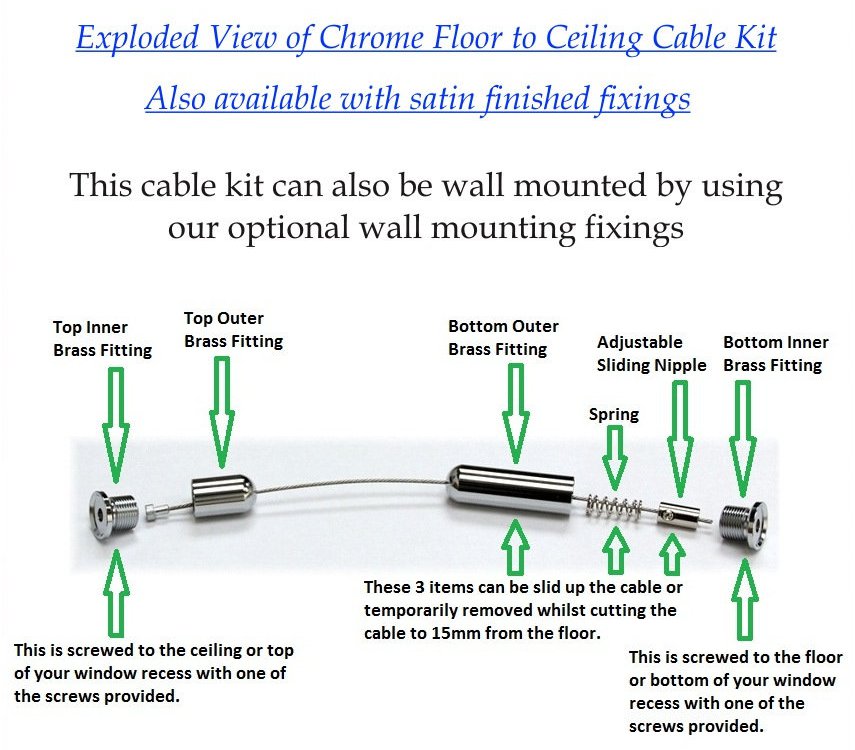
The following linked page details how to fit the cables in position. Please note that of the two choices chrome and satin, it's the satin cable kit which needs to be used with our hanging light pocket displays. The satin cable kit has a galvanised coating on the wire strands which increases the electrical conductivity.
The optional wall mounts are typically considered to be a good choice when you have three or more light pockets in a column (vertical). For when there's only 1 or 2 pockets in a column you might want to consider using our alternative side-grip clamp style light pockets which don't use cables.
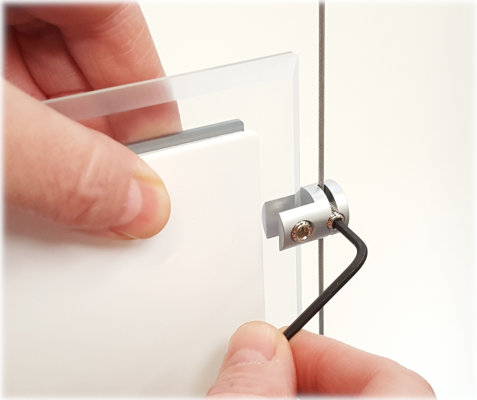
First remove the small grub-screw from each of the four clamps. Next, hold each pocket one at a time between the cables such that the cables locate into the slots of the clamps. Finally, reinsert the screws and tighten gently.
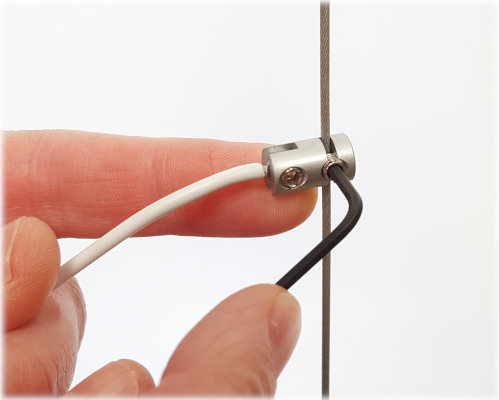
There are only two connections which are commonly known as positive and negative. The positive connector attaches to one cable and the negative connector attaches to the other. Simply remove the screw from each connector and attach them to the cables, ensuring to notice the red dot on one of the connectors which should be attached to the pocket side which also has a red dot on the bottom clamp.
Don't worry if you accidentally get the polarity reversed because that cannot damage the displays in any way; they just simply won't light up until you swap the connections around.
Plug into a normal UK mains socket to power-up the displays. The corner fixing holes can be used to screw the transformer's white body to any flat surface. By default, you'll receive the white 12V 5A 60W power supply with your display when it arrives.
We also have an optional 12V 7.5A black power supply which can be used to power a relatively large number of light pockets at a time, such as two A4 display kits each 5 pockets high, or two A3 display drops of 3.
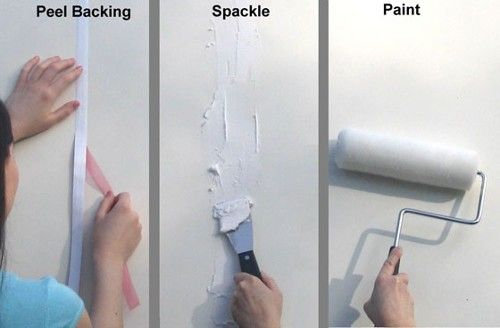
If your wall is being re-plastered, skimmed, or wall papered, then you have the opportunity to create groves (or channels) which the supply wires can be buried in. This is much like when decorating a living room and concealing the speaker wires for your TV's sound system.
Only very thin supply wires are required because our LED display systems emit a great deal of light for relatively very little energy consumption i.e. high luminosity and very energy efficient. Therefore, the groves you need to create can be very shallow indeed, requiring just a light skim to cover them up.
You will need to chase the wires for each individual light pocket. The left (negative) terminal of each pocket needs to make contact with the left terminal of all the others i.e. be connected in parallel; the same goes for the right (positive) terminal. You're free to chase paths to take whatever routes are most convenient in consideration to your displays mounted position. We recommend bringing all the wires together to a common point so that you only have a single pathway headed to where the power is being connected.
All the pockets are connected in parallel to each other at the rear of the backboard (back-panel). Therefore, you only need to chase one entry point from behind the backboard where the wires enter the wall. Using a backboard might be considered the easier way of doing it.
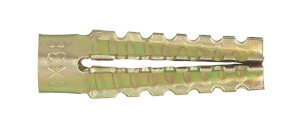
We recommend using metal wall plugs when screwing the inner body of the pocket's side-grip clamps to the wall. Small spade connectors can be crimped onto the ends of the wires which are then inserted (wedged) alongside the metal wall plugs. As you tighten the screw this further re-enforces the contact between the supply wires and the metal wall plug. The connection is now complete which allows the current to flow along the wires, through the side-grip clamps, and power the LEDs embedded within the light pocket's centre panel.
Use 4mm diameter threaded bar which passes through the light pocket's clamps inner fitting and through your wall. Simply fasten the nut onto the bar (typically accompanied with a washer) which secures the pocket onto the wall and at the same time connects the supply wire.
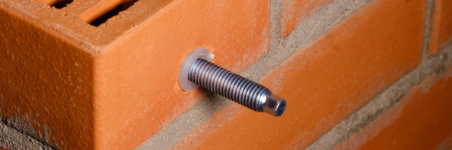
Having access to the opposite side of the wall makes life very easy. By replacing the usual screws and wall plugs with threaded bar, nuts and washers, mounting the light pockets couldn't be easier, mainly because you don't have to deal with hiding the supply wires on the display side of the wall.
It makes little difference to the amount of fitting work required whether you're using a back-panel or not. The bar (technically rod because it's round) has a nut attached at each end, one at the wall's display side which passes through the screw hole of the pocket's clamps or back-panel's stand-offs, and one at the rear where you can also place the power supply.
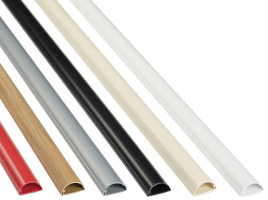
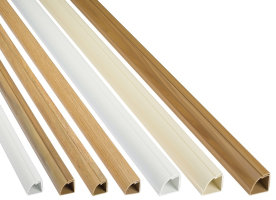
If you're looking to add a display to a room which has already been decorated and/or furnished, using plastic covers to conceal the supply wires can be very appealing, and although the plastics covers will be visible, they're available in different colours, sizes, shapes, and in general look aesthetically pleasing.
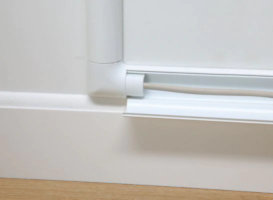
Plastic covers (or conduit) will need to run between each light pocket because they all need to be connected in parallel to each other. You can then route just a single length of conduit to the edge of the wall, ultimately to be headed towards where the power supply is situated.
Using a backboard in combination with conduit is another good practical solution. All the wiring which connects the light pockets in parallel to each other is quite well hidden on the rear side of the backboard (back-panel). The back-panel itself can be mounted to the wall using ordinary plastic wall plugs and screws. Just a single length of conduit needs to run across the wall to reach slightly past the edge of the back-panel, simply to keep the end of the conduit out of view which makes it look nice and tidy.